After much tinkering, I've re-visited my character drawing style in hopes of making a basic model I can build upon. Here's a step-by-step guide on how I did it, specifically how to do a front-facing character model for something like a turnaround sheet or for the basis of a 3D model. You don't have to do it in this exact order, just as long as you have something you like.
I did all of the below in PowerPoint using a $300 drawing tablet. If you don't have a drawing tablet yourself, or you're not so good at drawing, you can actually make a perfectly serviceable character model just using the shape tool in PowerPoint.
(If you make a shape then go into Format Shape, if you look in the top-left of the screen you'll see an icon called "Edit Shape". If you click on it then go down to Edit Points, you can actually mold the shape into anything you like. This was like magic to me when I first discovered it.)
1.
Characters are usually measured in “heads” – as in, how many of their own heads you can stack up next to them. If you're doing more realistic characters, they are usually between five and seven heads tall.
2.
Drawing a circle isn't too difficult. You can build it up with small strokes so it forms a circle gradually, or you can draw a square first and then put the circle inside it.
3.
The hips—the part where the body bends most—are about halfway down the body. The chest is about halfway to halfway, and the knees are halfway between the hips and the feet.
4.
This little line in the middle shows us where the bottom of the ribcage is - this is roughly the same position where the elbows will be at.
This again marks out where the bottom of the ribcage is, as well as where the hips start.
6.
7.
8.
9.
10.
You can draw ovals around the upper and lower legs to help define them. One oval goes around the top of the leg to the knee, while the other goes around the knee to the start of the foot. The result sort of looks like there's a system of pulleys going through the legs.
11.
If you keep your arms straight, your wrist will just about touch your hip.
12.
Hands stretch down just about halfway from the hip to the knee.
13.
14.
In most characters, this is the "brow line", and you actually draw it right in the middle of the face to indicate where the eyebrows will be. Since our character is designed a little differently, we instead use it to indicate where the nose would be.
15.
The top of our eyes is just a little over halfway between our nose line and the top of the head.
16.
17.
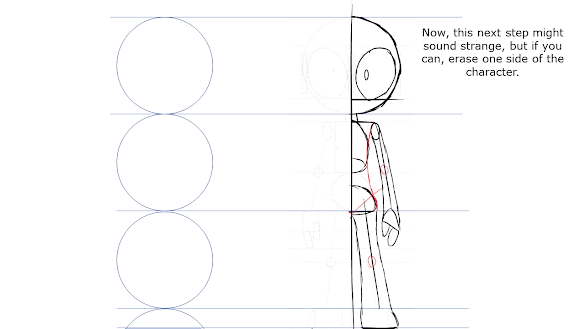
Once we have our base, we can draw all the details such as hair and clothes on top of it, then erase all the parts we don't need.
If you're making a character model sheet, or a basis for a 3D model, the next step is to draw what the character looks like side-on. I'll go into more detail about this later, but the general idea is to draw lines from your front-facing character to indicate where all the body parts are, then fattening or thinning them out in a side view. The neck usually has the same amount of thickness whether it's from the front or from the side.


Comments
Post a Comment